Hardware DIY/Mods/Repairs Thread

Has anyone crafted their own rack tubing using some metal tubing from Home Depot? I was seriously pondering this tonight as I stared at a rack full of metal tubing. For 8 to 10 feet of tubing, it's only about $13. Now, a 4ft long Gibraltar straight tube is about twice that when you buy it new. I figured, if they are the same diameter, I could substitute generic tubing for official Gibraltar tubing.

I've been wanting to add on to my rack, and this would be much cheaper than buying the branded tubing. I was just wondering if anyone had taken a stab at it yet.

That sounds like a good idea. Here are my thoughts:

Is the Home Depot tubing chromed? If it's not chromed, it might look screwy. Or it might look terrific, depending on the set and type of music.

If Gibraltar is charging $26 for four feet of chrome tubing, at today's prices, that's not outrageous.

Is the Home Depot tubing exactly the same diameter as the Gibraltar? If not, would it work anyway? Bring some clamps to the store and try the fit.

Are the end caps for the tubing available?

It would be a neat project if you could get it to work. Racks are much less complex than stands and you'd have a lot of flexibility to do what you wanted. For cutting, I would strongly recomment a chop saw, to ensure straight cuts.
 
The pipe from Home Depot is raw conduit. Aluminum I believe. It would have to go to a special shop to give it a shiny finish according to a friend of mine. He suggested I paint it, but I doubt paint would hold up after some abuse with clamps and what not. I'm not too, too worried about it being bright and shiny. After all, most of what I do is just in my music room. I don't expect to do much gigging any time soon and if I did, I doubt someone would walk out of the bar because I was using raw conduit instead of chrome plated tubing. heheh I was wondering if I could just buff it out, but my friend said I couldn't. I could always just replace my entire rack with the conduit and resell the Gibraltar tubing to make everything match. The hardware on my kit is black, and the super shiny chrome doesn't entirely match to my eyes.

I do want to bring a clamp in to check. Gibraltar tubing is 1.5". I know they have that in the conduit. But ya, there may be a slight difference. Next time I go to Home Depot I'll bring a clamp. I'm pretty sure you can get end caps there as well. Only one of my current rack tubes has an end capped. All of the horizontal bars terminate into T clamps, and two of my three vertical bars have boom arms on top to hold crashes. The leg tubes have 'feet' caps on them as well. So in my case, caps aren't too much of a concern though it is something to consider for the overall project.

I really like the idea of having custom length tubes to fit exactly how I want. I've been wanting a third side to my rack as well, so I can convert my hat stand into a legless one and mount a cymbal or two, or something over there. I have extra clamps now which warrant something new to add to the line up. hahah!
 
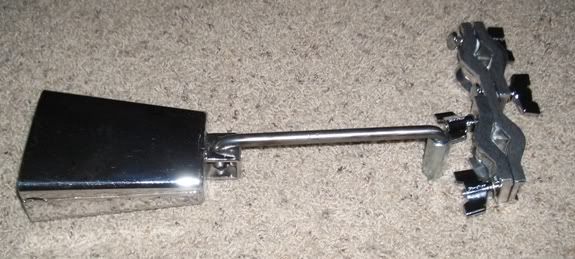
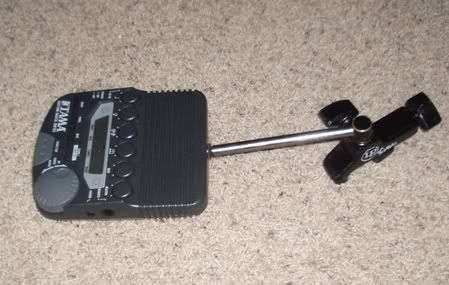
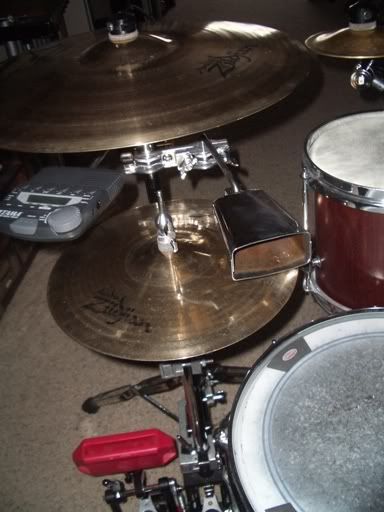
COMBINATION COWBELL/METRONOME HOLDER

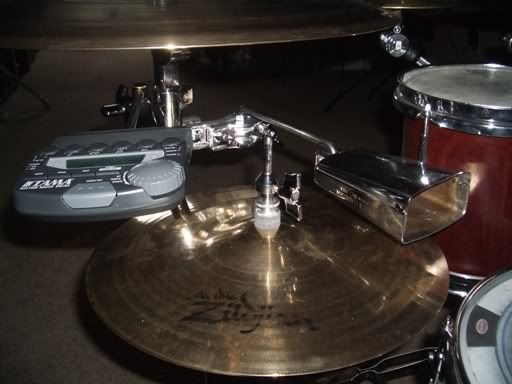
I have been using the metronome more and it really helps me to see it. I wanted to mount it where it would be visible, as it really helps me to see the blinking lights, yet not get in the way. I also wanted to mount a cha-cha cowbell. I decided the best place for both would be to my left, under the ride cymbal.

This is the mount for the cowbell - 3/8 rod bent and threaded with a deep bolt to fit into the clamp.
Newmounts4.jpg


This is the mount for the metronome. It has a 5 mm threaded hole in the back. I drilled a hole into the end of a 3/8 rod and threaded it, then inserted a bolt, tightened it and sawed off the end and added a rubber washer for grip and cushioning. The other end of the rod fits into an LP Claw.
Newmounts3.jpg


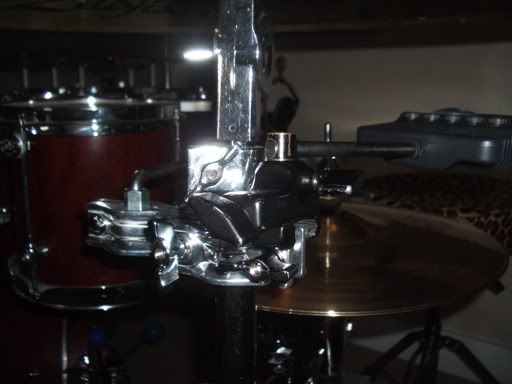
Both mounted. The clamp is attached to the ride cymbal stand and holds the cowbell rod. The LP Claw grabs the clamp.
Newmounts2.jpg


How it looks from the driver's seat.
Newmounts5.jpg


Newmounts1.jpg
 
Hi,
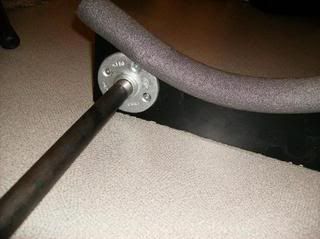
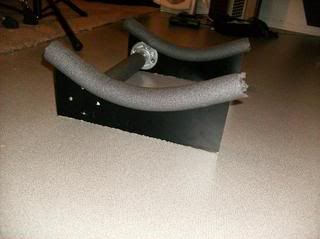
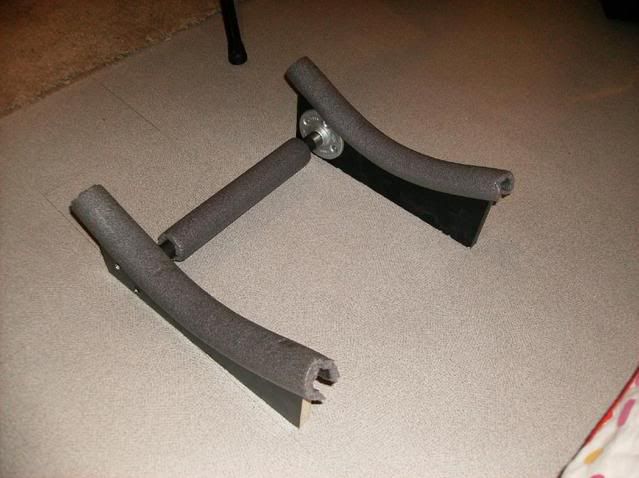
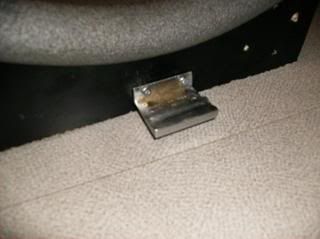
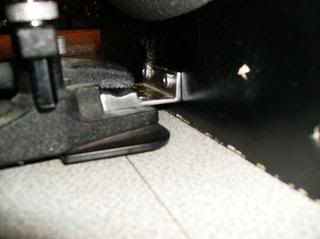
heres a riser I made for my 16" bass drum, it cost me 9$ to do.

I used some left over melamine I had, plumming pole, and a foam thing that usually goes on plumming stuff.

HPIM0460.jpg

HPIM0459.jpg

HPIM0458.jpg

HPIM0457.jpg

HPIM0463.jpg

HPIM0464.jpg


EDIT: according to GN scientist, what I used is: 1" black nipple, a couple of galvanized floor flanges, a stick of 1" x 3/4" wall foam insulation and a drawer handle
 
Last edited:
Hi,
heres a riser I made for my 16" bass drum, it cost me 9$ to do.

I used some left over melamine I had, plumming pole, and a foam thing that usually goes on plumming stuff.

EDIT: according to GN scientist, what I used is: 1" black nipple, a couple of galvanized floor flanges, a stick of 1" x 3/4" wall foam insulation and a drawer handle

Very cool! Looks like the pipe unscrews to break down for transport?

Professional looking work and it matches your set.
 
Finger saver for sticky Stands

This may or may not have already been covered.

Here's an old trick for stands that may be a bit 'sticky' when tightened due to the ferrous (pot metal) compressing onto steel and/or the washer bending on a unflat surface. Simple fix... 'fiber washers'. These can be had at local hardware stores. Fiber washers placed 'underneath the stock metal washer' will prevent the pot metal wing nuts from sticking.

A particularly nasty example of sticking stand tilters is the Sonor 1000 series stands (pictured below). The composition of the pot metal to steel on the Sonor 1000's make a vice like 'stick' when even moderate pressure is applied to them. Really hard on your fingers to open when this happens. Lubeing makes it worse, b/c you get a tighter grip.

With the fiber washer down first, you can do away with having to use two drumsticks as 'leverage pliers' to open tilters etc. Take your stock metal washer to the store for sizeing, you don't even want to try a 'cut down' a fiber washer, its not an option.

Works on ANY make/model of stand you have a sticking problem with.
 

Attachments

  • Sonor Y.jpg
    Sonor Y.jpg
    57 KB · Views: 4,658
Re: Finger saver for sticky Stands

This may or may not have already been covered.

Here's an old trick for stands that may be a bit 'sticky' when tightened due to the ferrous (pot metal) compressing onto steel and/or the washer bending on a unflat surface. Simple fix... 'fiber washers'. These can be had at local hardware stores. Fiber washers placed 'underneath the stock metal washer' will prevent the pot metal wing nuts from sticking.

Great idea. I have seen those fiber washers on things and wondered what they were for. I have some things that stick and I think i will get some fiber washers now and try it out.

You are right that lubricating something doesn't always make it easier to loosen. Sometimes, the lube lets you get things really, really tight to where you can't loosen by hand. Strange but true.

I've always wondered by stand parts are made out of low-grade pot metal. Maybe to save costs. But I'd be willing to pay more for stands that were made of high-grade and lighter steel.
 
CONVERSION OF STANDARD PEDAL TO LONGBOARD

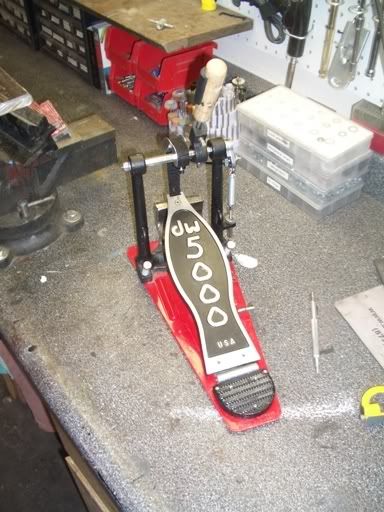
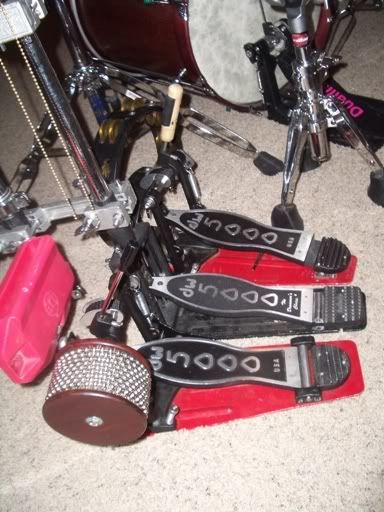
Fourstrings lamented the ridiculous expense of DW longboard and I popped off about how I could convert a standard into a longboard - he called my bluff and I had to try it just to see if I could. Total cost: $2 in bolts, $5 in shop costs, $30 for labor, about two hours of time for work and planning. Basically, I removed the heel plate and joined it to the footboard with a gusset, then attached the hinge to the heel plate.

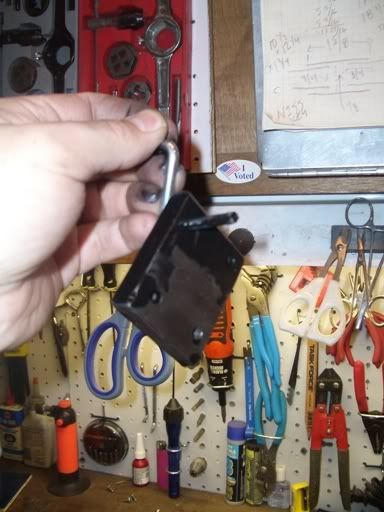
Pedal before the mod.
Long1.jpg


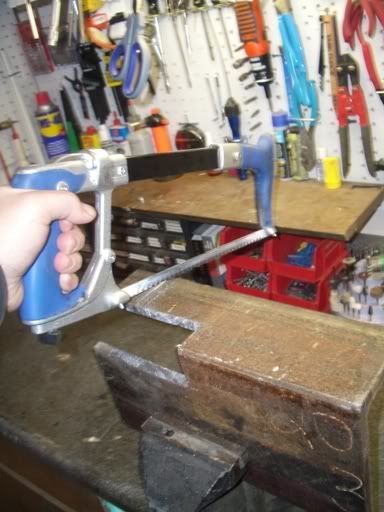
The hardest part was fabricating the gusset. I sawed off a chunk of half-inch-thick steel plate. It's overkill, but it's what I had handy and you will never ever have to worry about the gusset failing.
Long2.jpg


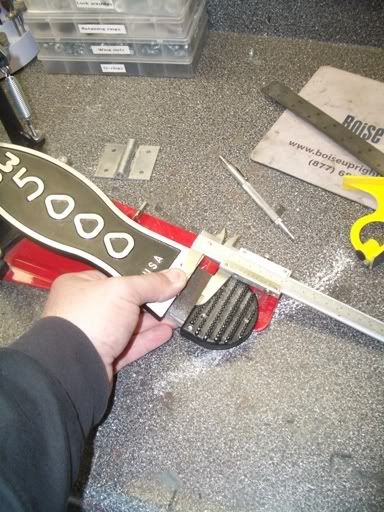
Careful measuring ensured the original dimensions would be carried over to the new pedal.
Long3.jpg


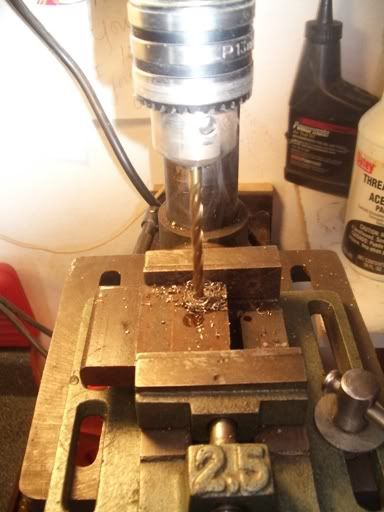
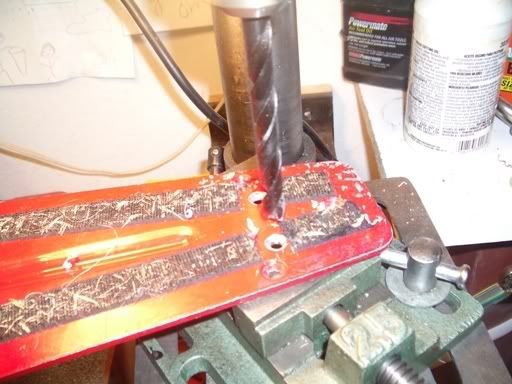
I drilled holes to mount it to the heel plate and foot plate (you can see the smoke from the burning thread oil).
Long4.jpg


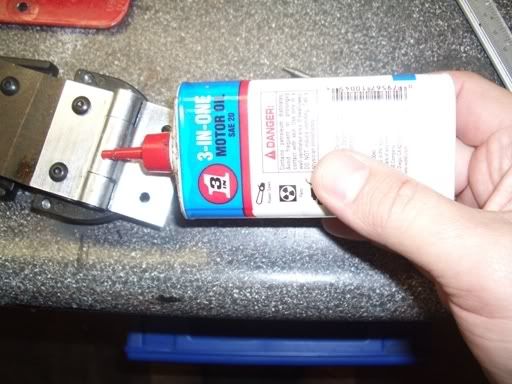
As long as I was taking things apart, I cleaned and oiled the original hinge.
Long5.jpg


This is the only permanent modification I had to make to the pedal, drilling a couple of holes to re-mount the hinge. Other than this, the mod is completely reversible.
Long6.jpg


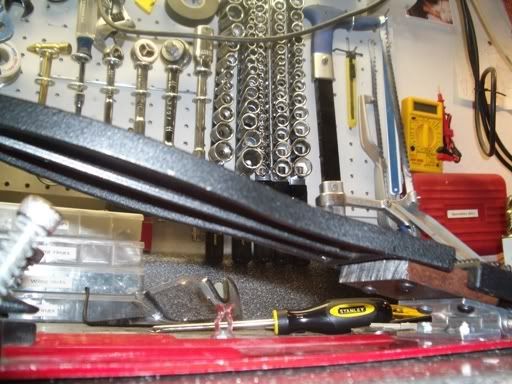
Putting it all together: checking the fit of the gusset.
Long7.jpg


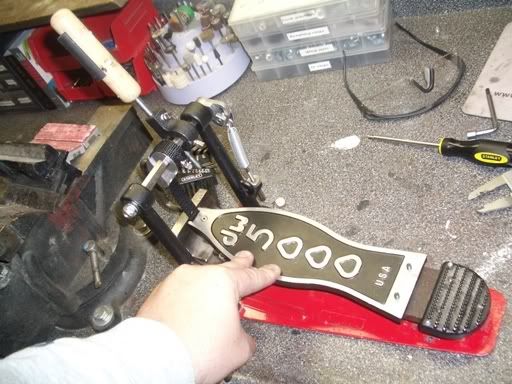
Checking of the action of the pedal.
Long8.jpg


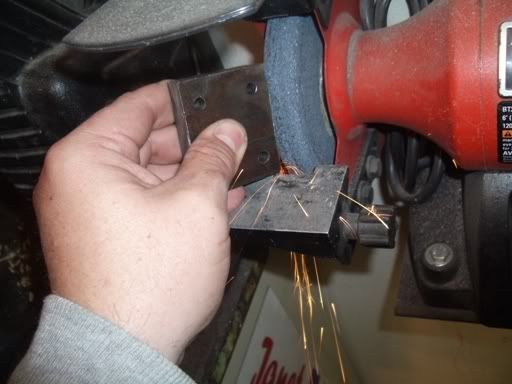
Once I confirmed the fit and function of the gusset, I disassembled everything for finishing. I ground the gusset edges smooth and cleaned off suface rust.
Long9.jpg


A coat of paint finished it.
Long10.jpg


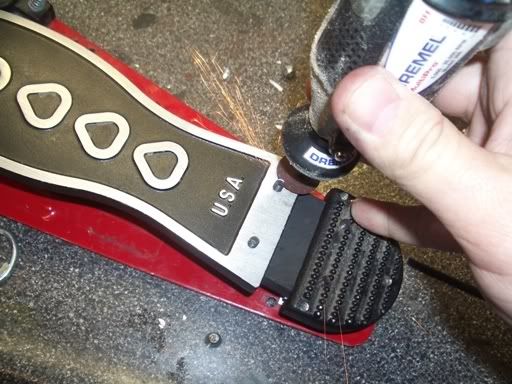
During reassembly, I used a Dremel to grind off the bolts and make them flush with the surface of the footboard.
Long11.jpg


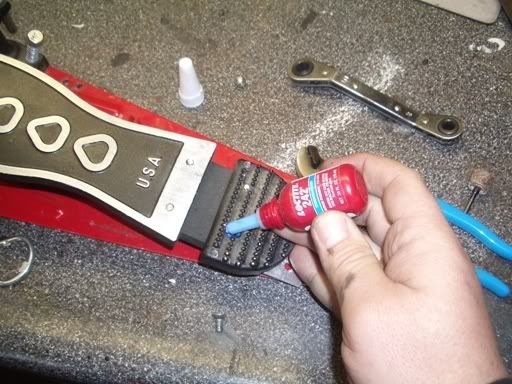
Some Loctite ensured the bolts will stay put.
Long12.jpg


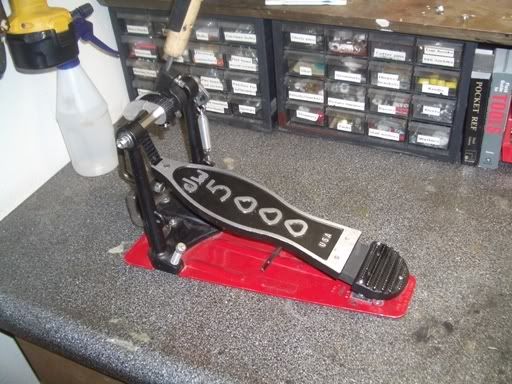
The finished pedal.
Long13.jpg


As used in the set.
Long14.jpg


I have to admit I'm not too fond of the action of a longboard. I've strictly played a standard pedal for 25 years so the longboard feels weird. I imagine if I'd started with a longboard it would feel normal. So I will probably reverse this at some point, but at least I can say I did it and tried it out.
 
Is that the stock, godawful hinge in pic 1 that gave the first 5000's their bad reputation?

Measured at rear of pedal, what's the distance from top of foot board, to the bottom of hinge?

What's your total foot board length as a long board?

Your 'gusset' looks pretty heavy.
 
Is that the stock, godawful hinge in pic 1 that gave the first 5000's their bad reputation?

Measured at rear of pedal, what's the distance from top of foot board, to the bottom of hinge?

What's your total foot board length as a long board?

Your 'gusset' looks pretty heavy.

Regarding your first question, yes, that is the stock hinge. This isn't even all that old for a DW 5000. In fact, I wasn't aware they had upgraded.

Second question: I'm confused. Do you mean what is the overall length of the unified longboard pedal, including the hinge? Let me measure that.

Third question: I will measure that too. You could add it up also by measuring a stock DW 5000 footboard, hinge and heel plate and adding them together.

Fourth question: Yes, it's somewhat heavy. I chunk of aluminum would be lighter and as strong as necessary. But this doesn't seem to make much difference anyway because it's so far back. It will certainly never bend! The pedal is a prototype just to see if I could do it and what it would be like.
 
theoritically if you would like to use thinner plate, say 1/8" thick. You could, if you are willing to add in some welding.

You would take the same size plate but of 1/8" steel. You could then make "fins" out of the same plate material, and weld them to the bottom. Cut a small half circle or a half oval, if you will, and weld 1 or 2 to the bottom of the plate (making sure they won't hit the bottom plate underneath (the red plate).

Anyway now that I have thoroughly confused everyone, welding fins to the back of a plate used in this matter would make it much more resistant to bending.

just a little fyi.

my 2 cents: you could do this with 1/4" plate which for this application would be highly unlikely to bend, and even if it does, you could take it off, heat it up and bend it back. OR after you make your first one and mock it up to make sure it all fits, you could make 2 or 3 as backups if you were concerned at all.

Make sure to cover it with the appropriate paint, it is iron after all, you don't want it to rust!

Those are some great ideas,thanks. I will give that some thought. But what purpose would the fins serve? To strengthen the gusset, like how the top and bottom of an I-beam make it stronger than just a strip of steel?

I think quarter-inch-thick plate would be just as good as half-inch, and easier to work with and lighter, and need no reinforcement. An eighth-inch would probably also work - the big red base of the pedal is 16th-of-an-inch aluminum and bends fairly easily. Really, quarter-inch-thick plate aluminum would be the best - fairly strong, very light and very easy to work with.
 
Measured at rear of pedal, what's the distance from top of foot board, to the bottom of hinge? So, the heel plate (extreme-rear of pedal), measure distance from the top of it, to the 'red' bottom plate, which the hinge sits on. Height of rear of pedal will affect action/feel.

Axis and Trick longboards are 12" front to back. The above measurement in question on the Axis long board is 3/4" with the foot board at a 24 degree angle. The hinge (pivot point) is usually placed at the 'extreme-rear' of a foot board. With the position of your hinge, its doubtful your getting the true feel of a longboard. Gusset's weight would also counter some action.
 

Attachments

  • L-UP_600.jpg
    L-UP_600.jpg
    11.6 KB · Views: 4,617
  • trick pedalll.bmp
    168.8 KB · Views: 4,757
Last edited:
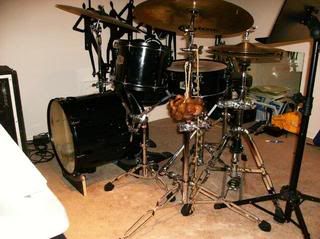
i shortened a boom arm under my ride.
i removed the tilter and used a hacksaw to take about 8" off the front to keep a polished end.

Very smooth work. I did this once a long time ago but I cut it off from the back. It was easier than but didn't look nearly as nice. Yours looks OEM quality.

If you have access to a drill press, you should consider drilling a hole through the tilter, so the hole would go through the tilter housing, through the boom rod and through the other side of the tilter housing.You could then put a machine bolt and nut through it. Or maybe use some epoxy to help hold the rod in the tilter housing (although you'd have to take it apart). The cymbal arm is going to get exposed to a lot of vibration and twisting and the rod could work its way out of the tilter someday - probably in the middle of a gig because that's the only time hardware breaks down.
 
Back
Top