Hardware DIY/Mods/Repairs Thread

GIMPING A CYMBAL STAND FOR NO-LEG HIHAT STAND

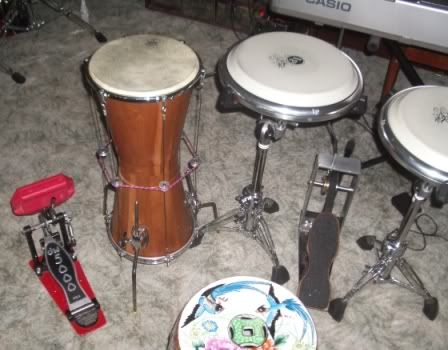
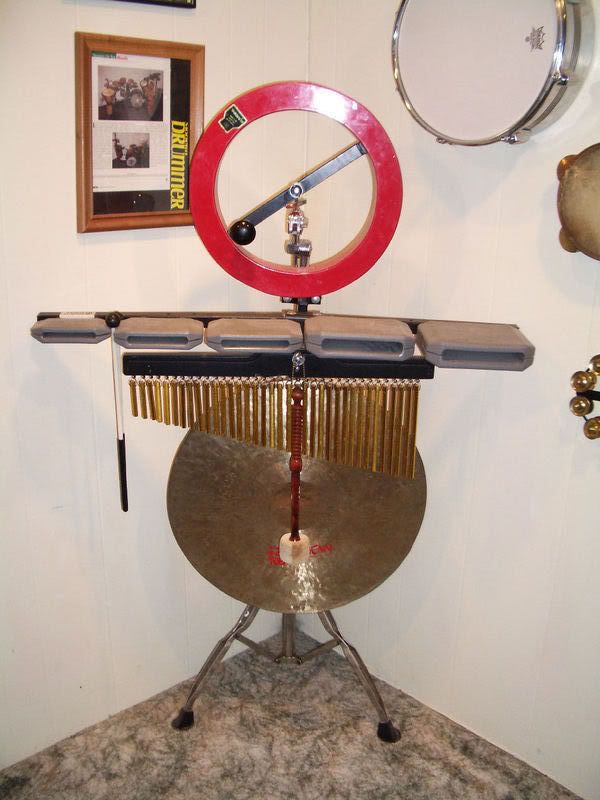
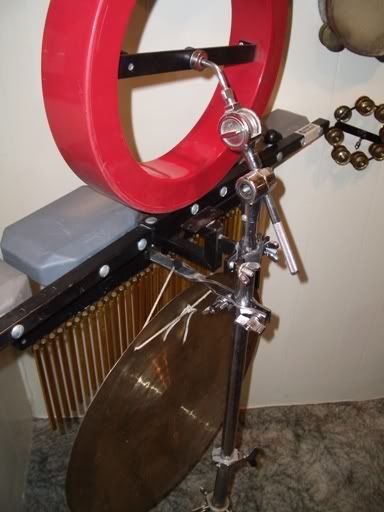
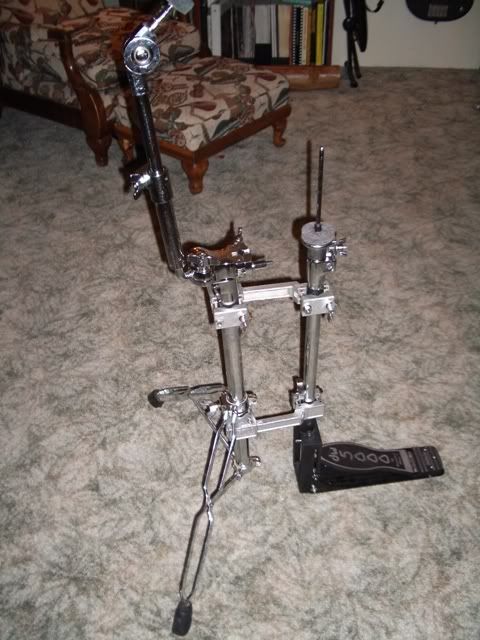
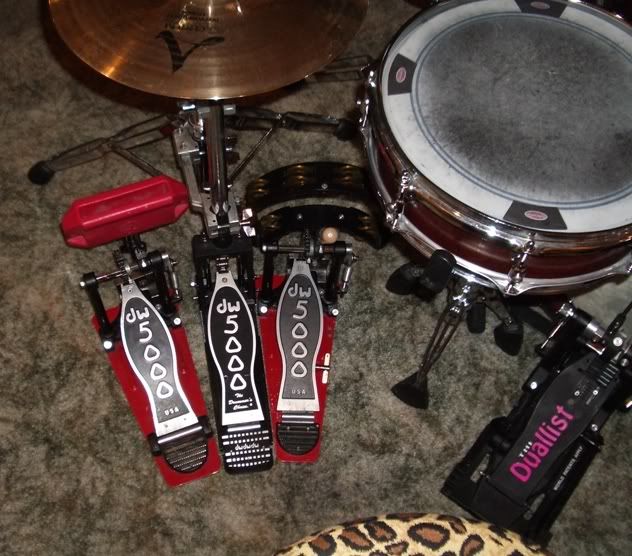
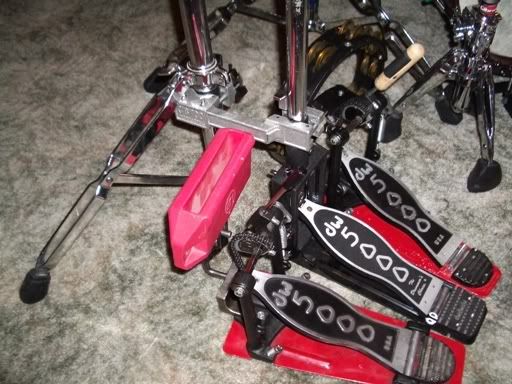
In my never-ending quest to streamline and reduce my hardware, I did this following mod. I removed one of the legs from the DW ride stand (I play open handed, ride on left). I got one of those two-legged DW 5000 hats and removed the legs, clamping it to the "gimp" tripod. The foot plate of the hihat stand locks into place, so it serves as the missing leg of the tripod. So, instead of having up to six leg contact points, I have just two. This frees up room for another foot percussion pedal.

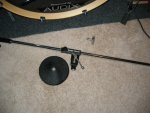
Setup minus cymbals. I put Velcro on the stands and clamp jaws, showing correct location during setup and preventing scratching. Two clamps ensure rock-solid support.
2legs3.jpg


As installed in set. Stand leg placement gives plenty of room for foot pedals.
2legs1.jpg


Close-up. I figure I saved a fair amount of bulk and about six pounds in hardware weight with the mod - which I of course immediately gained back with the second foot percussion pedal. The only downside is that setup is a bit trickier, as a two-leg cymbal stand doesn't stand up very well!
2legs2.jpg
 
O.k. this is not quite a DIY Mod, but when I designed my drum I thought to myself damn I don't need no stinkin' rim suspension system, so I designed my lugs to accomodate my DIY suspension system,
and taking the toms of the stand is not necessary for head change, even if most of us probably do it anyway.


IMG_0314.jpg
 
O.k. this is not quite a DIY Mod, but when I designed my drum I thought to myself damn I don't need no stinkin' rim suspension system, so I designed my lugs to accomodate my DIY suspension system,
and taking the toms of the stand is not necessary for head change, even if most of us probably do it anyway.

Very cool. I'm really interested in your suspension system. How did you make that? I've seen those before, ones that have four contact points on lugs on opposite sides, but I forget the manufacturer. Neat how you just made your own!
 
Very cool. I'm really interested in your suspension system. How did you make that? I've seen those before, ones that have four contact points on lugs on opposite sides, but I forget the manufacturer. Neat how you just made your own!

The key to it was the design of the lugs, so it can accommodate the suspension system.
The system itself is regular 3/4" aluminum flat material from Home Depot.
I bend them a little outwards the tom holder goes a little further into the Pearl holder.
The pearl tom holder I bought of course, after that I brought it somewhere for powder coating.
I will take some picture with the suspension system off, that clears some thing up, because the lugs underneath the suspension system differ slightly from the other ones.

Your work is very finely finished and looks OEM quality. I do a lot of mods, some of them pretty good, but I have trouble getting stuff to look so professional.
 
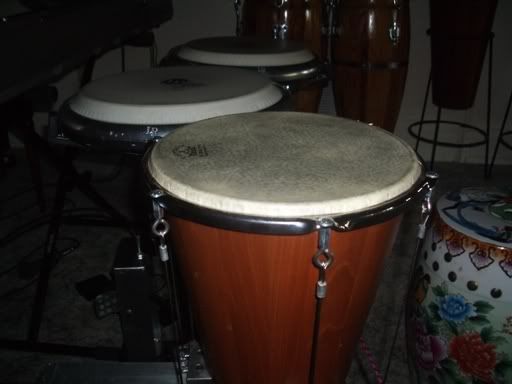
CONVERTING A STICK DRUM TO A HAND DRUM

I got one of these foot-controlled variable-pitch Talkit drums last year at www.b-radpercussion.com. He has stick and hand models and the stick models have standard Remo drumheads and triple-flanged hoops, while the stick models have conga-style rims and goatskin heads.

I wanted the ability to play my Talkit by hand, yet still keep the option to play with sticks. So I used a hacksaw and Dremel to remove the rim of the hoop, exposing the head where it goes over the bearing edge, much like a Comfort Curve conga or bongo rim. The drum uses cables to control tension and the cables are anchored to the hoops with eye bolts and nylon lock nuts. I removed the lock nuts and got some low-profile carriage bolts and extra-deep connector nuts.

As a result, I can comfortably play this with my hands, or incorporate it into my drum set for stick playing. Aside from chopping the hoop, I have done nothing permanent to change this remarkable instrument and I could put it back to OEM with little effort.

Close up showing chopped hoop, carriage bolt and deep nuts.
Talkit2.jpg


As played in percussion setup. The foot pedal for controlling the Talkit drum is between the conga stands and a bicycle cable connects with the drum's pulley system.
Talkit1.jpg
 
Another DIY internal mic mount

I've got a show coming up Saturday at an outdoor festival. The band changes are really quick, so I called up the sound company to ask for advice. They suggested that I have all my mics already mounted up, so when we set up the drums, all we have to do is plug in and set levels. Easy enough with my toms/snare, but I wanted to have my bass drum ready to go, too. So I devised a mount using one L-bracket, two hose clamps, and some rubber sheeting that you use to keep things from sliding around in drawers. I just used the upright shaft from my regular bass drum mic stand and clamped it to the L-bracket, then mounted the L-bracket inside the bass drum with a lug screw. Several layers of the rubber sheeting provide cushioning (and hopefully enough isolation for my purposes.)The cable runs right out the tom mount bracket, which I don't use.

Pic 1 shows the remains of my original mic stand (it all screws back together)
Pic 2 shows the bracket screwed to the inside of the drum
Pic 3 is a front view
Pic 4 shows the mic installed and the cable run through the mount. I'm trying the mic pointed at the reso head, per DMC's suggestion. A quick recording indicates it'll sound fine - we'll see how it sounds through the PA Saturday!
 

Attachments

  • IMG_2024.JPG
    IMG_2024.JPG
    208.1 KB · Views: 5,451
  • IMG_2022.JPG
    IMG_2022.JPG
    70.9 KB · Views: 5,385
  • IMG_2021.JPG
    IMG_2021.JPG
    131.6 KB · Views: 5,402
  • IMG_2023.JPG
    IMG_2023.JPG
    162.7 KB · Views: 5,357
Re: Another DIY internal mic mount

I've got a show coming up Saturday at an outdoor festival. The band changes are really quick, so I called up the sound company to ask for advice. They suggested that I have all my mics already mounted up, so when we set up the drums, all we have to do is plug in and set levels. Easy enough with my toms/snare, but I wanted to have my bass drum ready to go, too. So I devised a mount using one L-bracket, two hose clamps, and some rubber sheeting that you use to keep things from sliding around in drawers. I just used the upright shaft from my regular bass drum mic stand and clamped it to the L-bracket, then mounted the L-bracket inside the bass drum with a lug screw. Several layers of the rubber sheeting provide cushioning (and hopefully enough isolation for my purposes.)The cable runs right out the tom mount bracket, which I don't use.

Pic 1 shows the remains of my original mic stand (it all screws back together)
Pic 2 shows the bracket screwed to the inside of the drum
Pic 3 is a front view
Pic 4 shows the mic installed and the cable run through the mount. I'm trying the mic pointed at the reso head, per DMC's suggestion. A quick recording indicates it'll sound fine - we'll see how it sounds through the PA Saturday!

Very cool and elegant mod, with no permanent alteration of the drum or essential components. How did it sound at the gig?

One question: What do you do when you need to mount the toms in the bass drum? Or have you switched to permanent suspention for the rack toms?
 
Re: Another DIY internal mic mount

Very cool and elegant mod, with no permanent alteration of the drum or essential components. How did it sound at the gig?

One question: What do you do when you need to mount the toms in the bass drum? Or have you switched to permanent suspention for the rack toms?

I use a Tama double tom stand for the rack toms, generally. I haven't used the bass drum mount for quite a while. If I wanted to use it, I guess I would have to run the mic cable through the vent hole or maybe install a female XLR jack directly into the shell.

BTW, it sounded great at the gig! Setup was a breeze - I set up, plugged in, and setting levels took less than a minute. Entire sound check took maybe 5 minutes. They had a good sound company working the event, thank goodness.
 
you guys all have great ideas...i wish i could come up with genius stuff! keep 'em coming!
 
im going to have to secretly do that when my shop teacher is looking the other way.........im defenintly going to use those ideas if thats ok with you.......jeez........brilliant!
 
Be my guest. That's what we are here for. Just remember...Safety glasses.

Three dollars for a four foot piece of Oak, used about 18 inches.
Fourteen dollars for the 3/8th inch pieces of aluminum rod, one 8 footer, one three footer.
A Dremel tool with drill press stand, hack saw, sandpaper. etc etc etc.

A trade secret...Well not really. The chimes are 3/8th inch thick and I drilled a whole every 5/8th inch in the wood to tie them on. This puts them close enough to touch without a lot of force. Any closer won/t help and any further away and you would have to really move them to have them touch. Shhhhh....
 
Last edited:
Be my guest. That's what we are here for. Just remember...Safety glasses.

Three dollars for a four foot piece of Oak, used about 18 inches.
Fourteen dollars for the 3/8th inch pieces of aluminum rod, one 8 footer, one three footer.
A Dremel tool with drill press stand, hack saw, sandpaper. etc etc etc.

A trade secret...Well not really. The chimes are 3/8th inch thick and I drilled a whole every 5/8th inch in the wood to tie them on. This puts them close enough to touch without a lot of force. Any closer won/t help and any further away and you would have to really move them to have them touch. Shhhhh....

One idea on the build: you may find the string wearing out a lot. I have a pair of LP chimes that were strung with Kevlar thread and they wore out before long and the chimes started dropping. Also, they used staples to attach the thread to the wood and that abraded the thread a lot.

Instead of more thread, I used the smallest possible plastic cable ties. I removed the staples and used very small eye screws to hold the cable ties to the wood frame. I clipped the cable ties of excess material.

The sound of the chimes is slightly less brilliant and the chimes stop moving a little sooner (I prefer to use the term "more controlled and focused") because the cable ties are a heavier than the thread. But they still sound great and are extremely durable.


You might be able to see the results in these photos:
Weathermachine.jpg


wm2.jpg
 
Mine are strung with 15 pound monofilament line. They are not tied singly but I used one long piece. Starting from the back going thru the wood thru the rod and then back thru the wood. There is two strands going thru the wood but only one thru the rods. After I drilled the holes I used a small burring bit and sort of counter sunk or smoothed out the hole to get rid of sharp edges. Only time will tell how long they last but to re-string the whole thing only takes about an hour. As I pull the line back thru the wood the second time, I peg the hole with a round toothpick so as not to have it droop until I get the next rod strung. I use about 3 pegs and move the first one after I get the third hole pegged, etc. I am going to buy some braided fly fishing backing line and restring this set. I actually came home tonight and drilled another piece of oak and added 8 more bars...its 30 now. Sounds gorgeous.
 

Attachments

  • P7100004.JPG
    P7100004.JPG
    74.8 KB · Views: 5,393
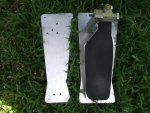
Simple Axis bottom plate mod, adds stability, playability w/heavy playing.

Mod plate: 1/4" thick aluminum stock
7" across the front
6" across at the rear
5 7/8" amidships
14 1/4" front to back

Stock plate:
5 1/4" across the front
4" across at rear
3 7/8" amidships
14" front to back

Less tipping side to side under heavy playing with the bigger plate(s). This mod is easy, you have stock plate as a template with holes already in place. Design of mod'ed plate follows the stock outline, larger of course.

Mark out the shape, cut on band saw, grind edges, mark, punch and drill holes, obviously a sharp bit and a drill press or mill works beat. Counter sink bottom holes, assemble, done.

Axis will probably do this mod for you if you inquire, may or may not be cost effictive compared to local machine shop. If your in school, easy metal shop project.

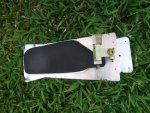
Foot board plates are 16 ga aluminum stock cut to custom shape that loosly resembles stock Axis foot board. Wider foot boards facilitate barefoot heel-toe technique. These plates are velcro'ed on top of stock Axis foot board(s).

The black layer on top is a Wal-Mart item called 'Foamies' 9x12" sheets of 2 mm thick foam with an adhesive backing found in the 'craft section' and .50 a sheet, cut to shape, peel and stick. Great for bare foot playing.
 

Attachments

  • DSCF0487 top.jpg
    DSCF0487 top.jpg
    85 KB · Views: 5,410
  • DSCF0488 top r-l.jpg
    DSCF0488 top r-l.jpg
    100.5 KB · Views: 5,406
  • 89 nice.jpg
    89 nice.jpg
    104.6 KB · Views: 5,431
Nice job Les. Always fun to be able to make your own modifications. That has to be as stable as an aircraft carrier being that wide. Again, good job.
 
Back
Top