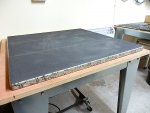
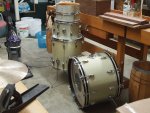
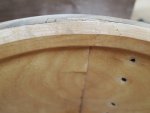
It's hard to tell from the closeup of the edge if the wrap is tucked into the lap joint. Does it appear to you that it is? That's the way Ludwig used to do it. But I thought they had stopped that practice by the blue and white era. Maybe the toms are super-early B&O. Or maybe re-badged. What are the serial numbers?
Not answering your question here, just curious... I'm always curious about the myriad little inconsistencies in Ludwig's production history.
But hang loose for a bit. Someone with a wealth of Ludwig info will chime in soon.
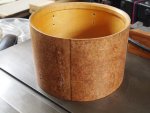
There are lots of inconsistensies in that era of Ludwig drum production,like for instance ...ply layup, construction,and badges used.There are clear interior ,Keystone badge kits out there.Some were maple/poplar/maple,some were mahogany/poplar /maple..
The famous Ludwig bump,or the practice of putting the wrap into the scarf joint ,was gradually phased out,going into the 70's.But you may still find some B/O badge earlt 70's drums,with that scarf /wrap joint,that were actually made in the late 60's,but badged later.
Some kits ,also came from the factory,with both keystone and B/O badges...on the same kit,with shells being made some time apart.Ludwig also made factory kits,with chrome and nickel hardware on the same kit,in the early 60's.
You can also find some early 70's Standard kits,with classic lugs,and not Standard lugs.
So,there is no one thing,that screams non Ludwig imposter,as these drums,were not aways consistant.The same can be said for the other big 3 as well,not just Ludwig.It's just that Ludwig sold more drums that any other drum maker,and was running 6 days a week,24 hours a day.
One must remember also,only Ludwig and Slingerland,made their own drum shells.Rogers,Gretsch and Camco,used shells made by Jasper and Keller.
Steve B


")